Showing posts with label party ideas. Show all posts

Friday

Baby Shower for Nolan

My brother and sister-in-law are expecting another little boy in a few weeks! I can't wait to meet my new nephew! We hosted a couples dessert and cocktail baby shower last weekend and it was too fun! Here's a recap of the evening.


DIY Diaper cake tutorial HERE !


The dessert table was full of goodies! We had cupcakes, mustache brownies, pie pops, rice krispie rattles, cookies, and candy!


We had a "kid zone" area where kids played with bubbles and toys. It kept them entertained for hours! 
How cute are these three? Soon enough there will be another little boy running around! 


Cousins! I'm 20 weeks and my sister-in-law is 30 weeks!

Monday

Diaper Cake

We just threw my sister-in-law a baby shower (post coming soon!) and I wanted to share the diaper cake I made! They're so easy to make and are a great present, centerpiece, etc.
What you need:
-Diapers (I used about 100)
-cardboard
-wrapping paper (optional)
-large rubber bands
-water bottles (optional)
-ribbon, embellishments, etc. 

Step 1: Cut out cardboard base and wrap with decorative paper (optional). I like to do this just in case some of the bottom ends up peeking out. To cut out a large circle, you can simply trace a household item (pots, pans, clock, etc.) or use the good old fashion pencil and string trick!


Step 2: Build up bottom layer. To save diapers, I bundled up water bottles to fill in the center. I've made diaper cakes before and added gifts as the center of each layer. You can put fun things like rolled up clothes, baby shampoo, etc. Rubber band the items together to keep them in place.
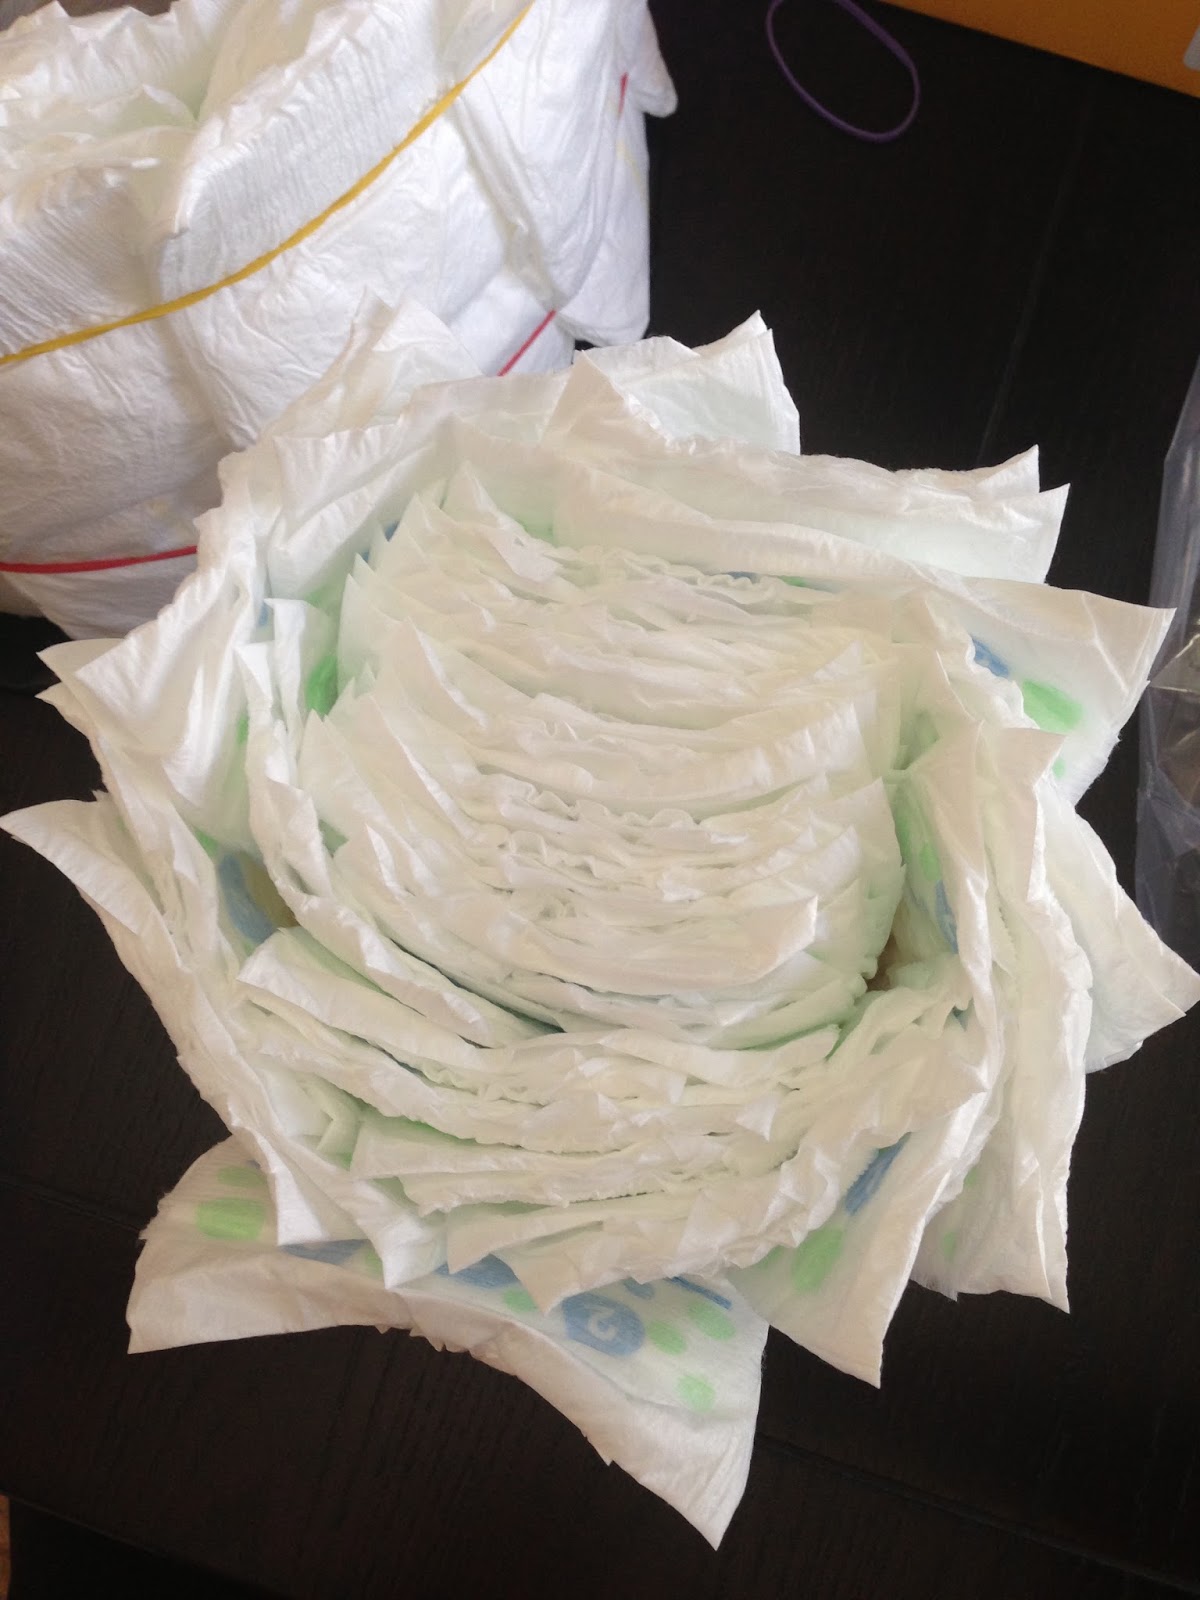
 Step 3: Build each layer up. Place a large rubber band around the core (water bottles) and tuck in diapers, slightly overlapping each diaper.
The beginning of the bottom layer.

Layers and layers of diapers!
Once you have a few layers of diapers and the the cardboard piece is covered in diapers to your liking, add an extra rubber band to the top for extra support.

Step 4: Secure a bundle of diapers, water bottles, baby items, etc. as a core for the next layer. I just used diapers. Use the same technique to overlap diapers securely under the rubber band until you've reached your desired fullness.


 Step 5: Add embellishments. I used the ribbon to cover up the rubber bands on each layer. Cute, easy, and fun to make!

Here's the end product! It turned out great. I can't wait to share the baby shower details soon!

Tuesday

More of What You Want!

I'm so blessed to have such wonderful fans and followers. My blog has been growing like crazy, and I never imagined anyone other than my mom would be reading my silly little blog. Well, you have proven me wrong! As always, I love your feedback!

I want to know what it is that you love about the blog? What is your favorite category to check out? What do you want more of?

-Classroom/Kids
-Decoration
-DIY
-Fashion
-Fitness
-Organization
-Party Ideas
-Pregnancy
-Products
-Q & A
-Recipes

Leave me some comments, or e-mail me, and let me know what you want to see more of! I can't wait to hear what you have to say! As always, thanks for following me and checking out my world!

Friday

Gender Reveal Party

We just had our gender reveal party and it was a blast! I'm so glad we had this party because it gave us an opportunity to reveal the gender to our loved ones at the same time. It was a small and intimate party and we were able to share this fun and exciting time with the people that mean the most to us. The theme was "Guns or Glitter" simply because my husband loves to hunt and is an outdoorsy man, while I'm pretty darn girly and love all things pink and sparklie! It was awesome! Here's a recap of our night!


...It's...a...GIRL!!!!!!!!

 Glitter Wins!!!